Member-only story

Check out this link to read this story for free.
Set up a local jupyter notebook to be able to run a bunch of cool stuff. Typically notebooks are used for data science workflows involving numpy and pandas. In this tutorial, let’s step through how to start a jupyter notebook.
First run a docker environment
docker run -it python:latest shThis will open up a shell into a docker container with the python image from dockerhub.
Now it’s time to connect to the docker container using VSCode. Open up VSCode and once it is open, click on this blue button on the bottom left of the window.
Then a drop down menu will appear. Click on “Attach to Running Container…” as highlighted in grey below.

Select the python container that we started in step 1 (if only one container is running it will only show one option).
Next download all the relevant dependencies. In this case we will need jupyter of course and pip as well.
apt update
apt upgrade -y
apt install jupyter pip -y
pip install uv
This will download all the tools needed to run a jupyter notebook. Then run the following command.
jupyter notebook --allow-rootCreate a file that ends with .ipynb in the working directory. This is a jupyter notebook.

Add the following in order to install all dependencies.
Create a map
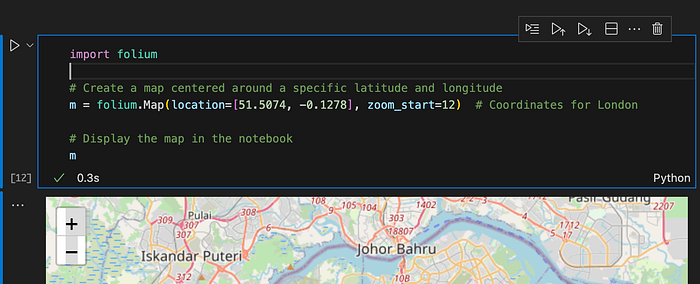
import folium

# Create a map centered around a specific latitude and longitude
m = folium.Map(location=[51.5074, -0.1278], zoom_start=12)  # Coordinates for London

# Display the map in the notebook
m
This will produce the interactive map below
This is your very own Jupyter notebook running locally that you can play with.